Let’s make a little paper Christmas tree from just one sheet of green paper! We fold it, snip a few cuts with scissors and fold the branches down, and the 3D tree stands up all by itself. No glue and no template, only paper and scissors.
Make a few in different greens and one in white for snow, and you have a whole winter forest for a Christmas table, a windowsill or a classroom display.
It’s a lovely project to make together. One person folds, another one cuts the branches, and every tree comes out a little different.
BEFORE WE START
What you need.
Materials
- Green paper
Tools
- Scissors
- A paper trimmer or a ruler
STEP BY STEP
Let’s make it.
- 1
Cut a square
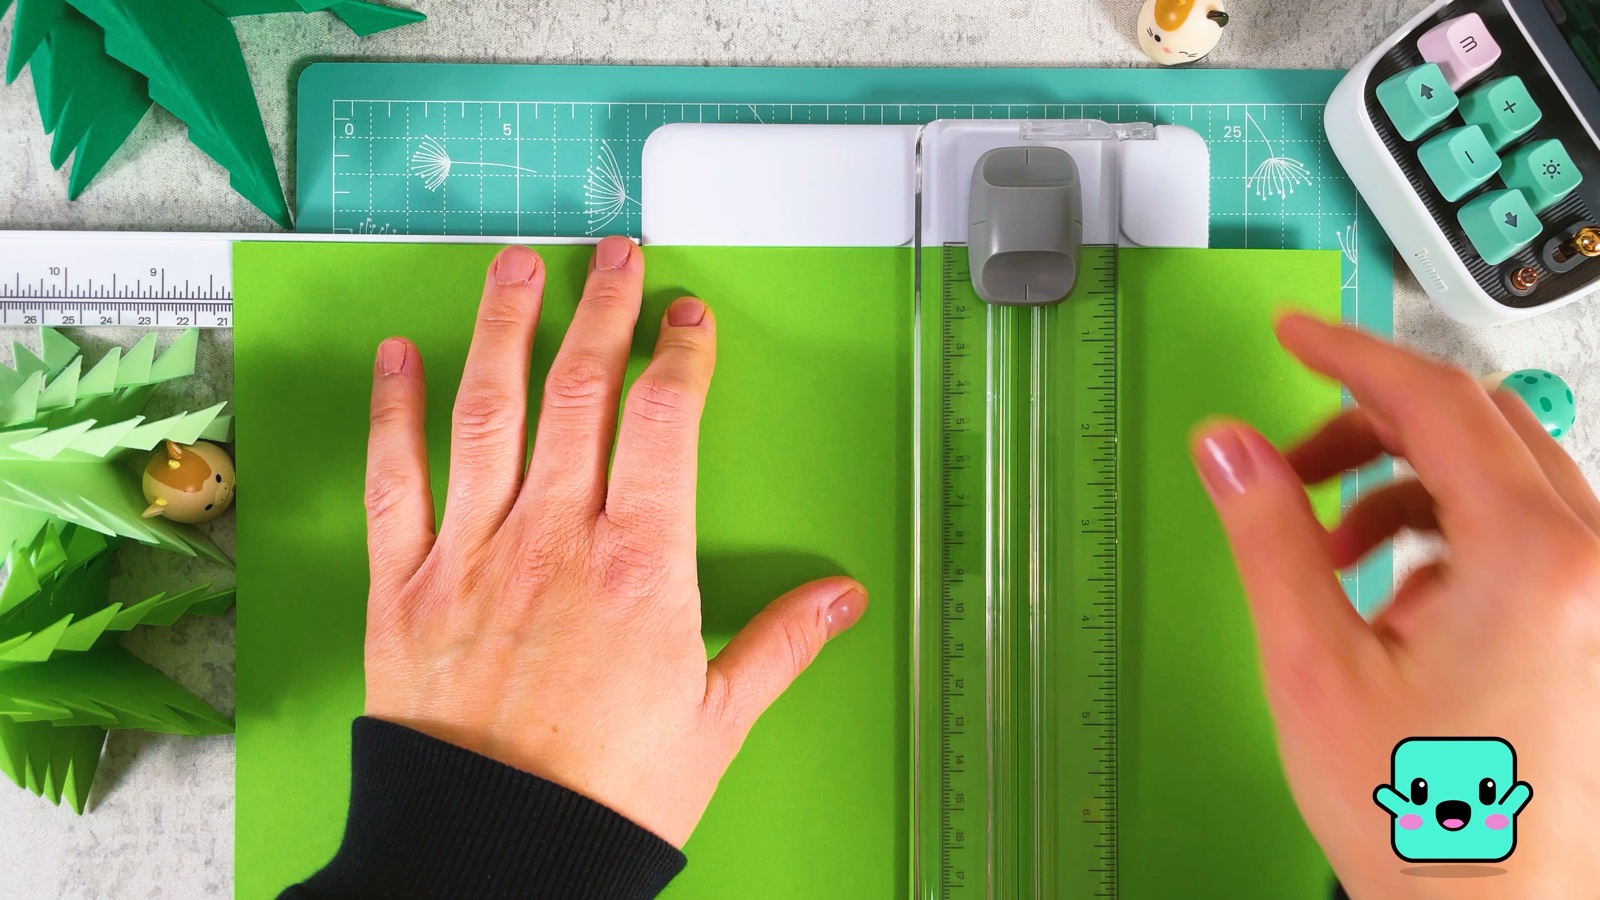
Start with a sheet of green paper, A4 or US Letter. Cut it into a square. A paper trimmer makes it quick, but a ruler and scissors work too.
- 2
Fold in half both ways
Fold the square in half and open it. Turn it a quarter turn, fold it in half again and open it. Now you have a cross of creases.

- 3
Fold the diagonals
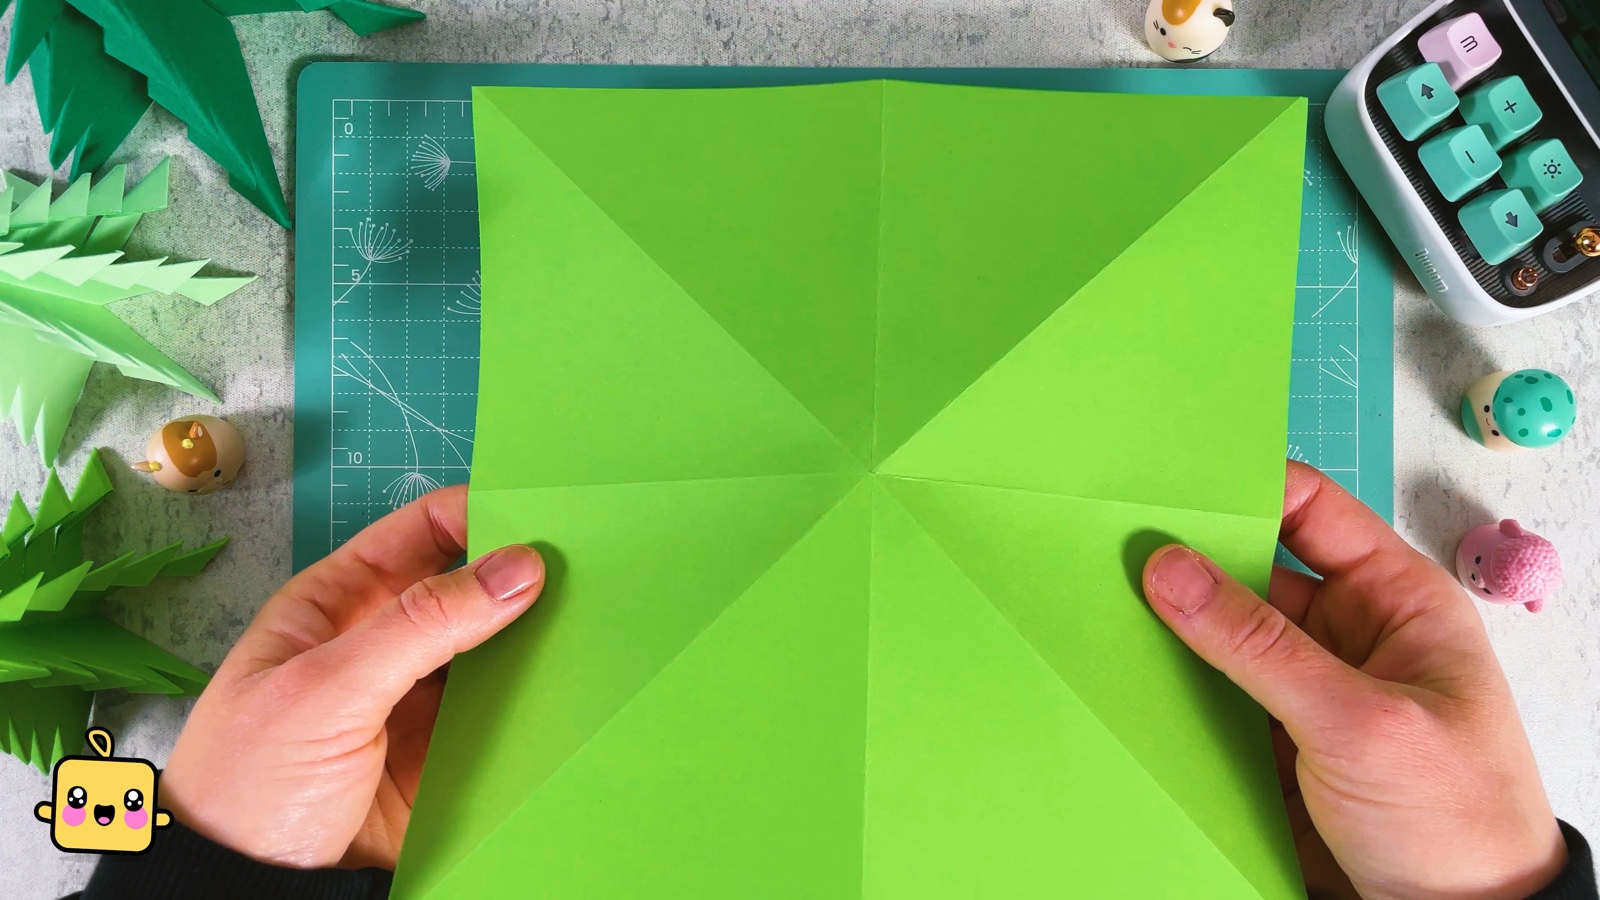
Fold the square corner to corner into a triangle and open it. Do the same with the other two corners. Press every fold flat.
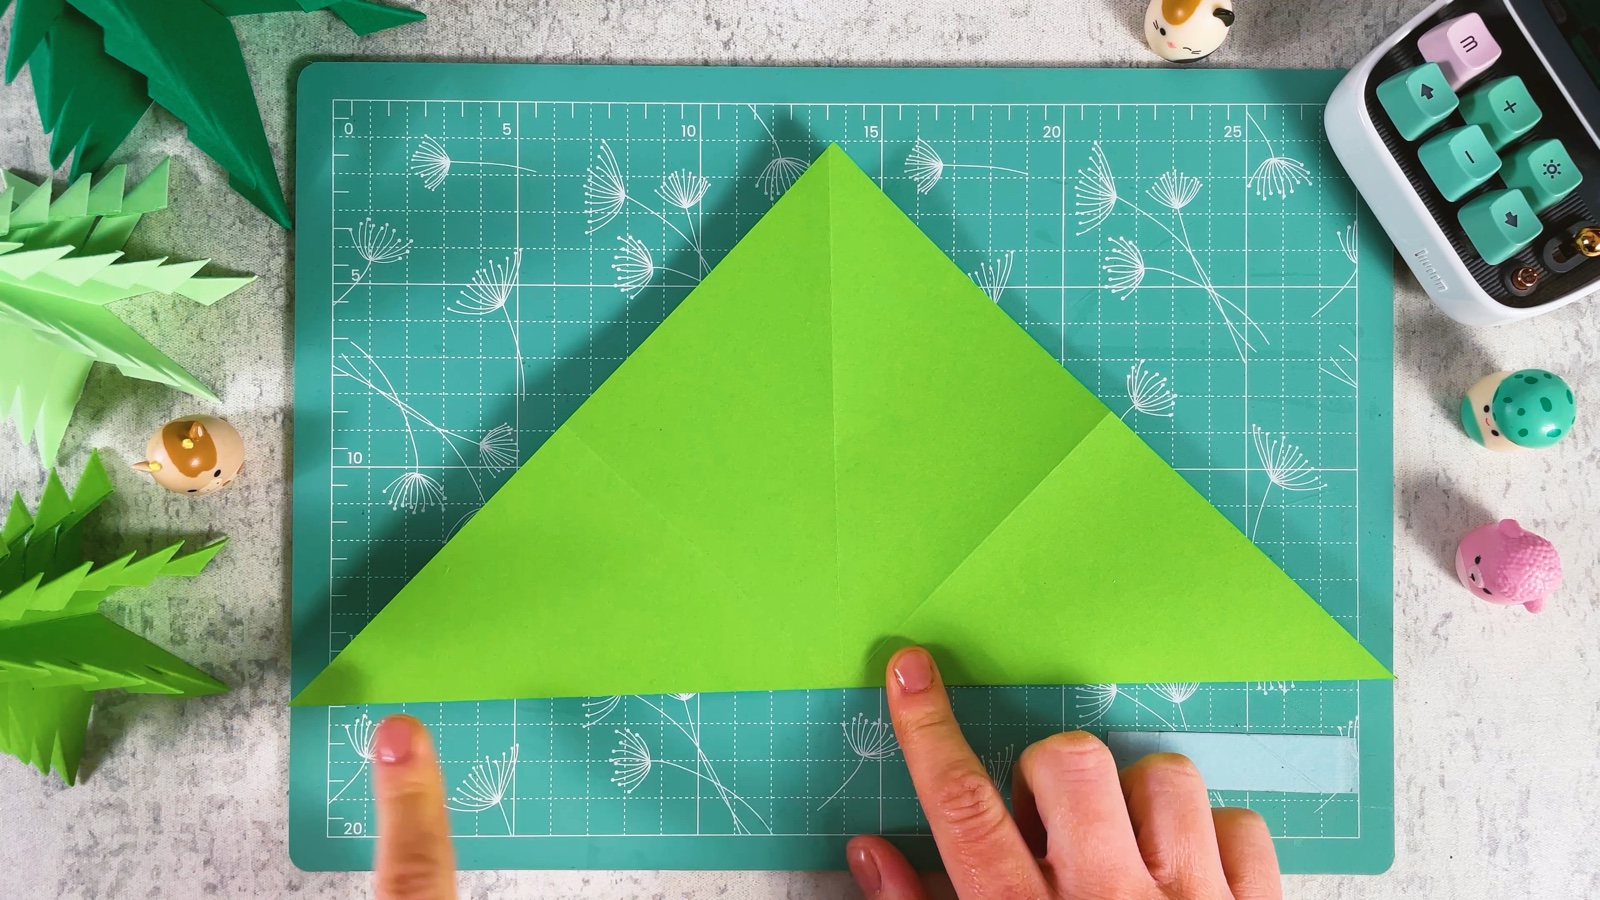
Open the square again: now you can see all the creases, a cross and two diagonals.
- 4
Fold it into a triangle
Open the square. Hold it with both hands and push the sides in along the creases.
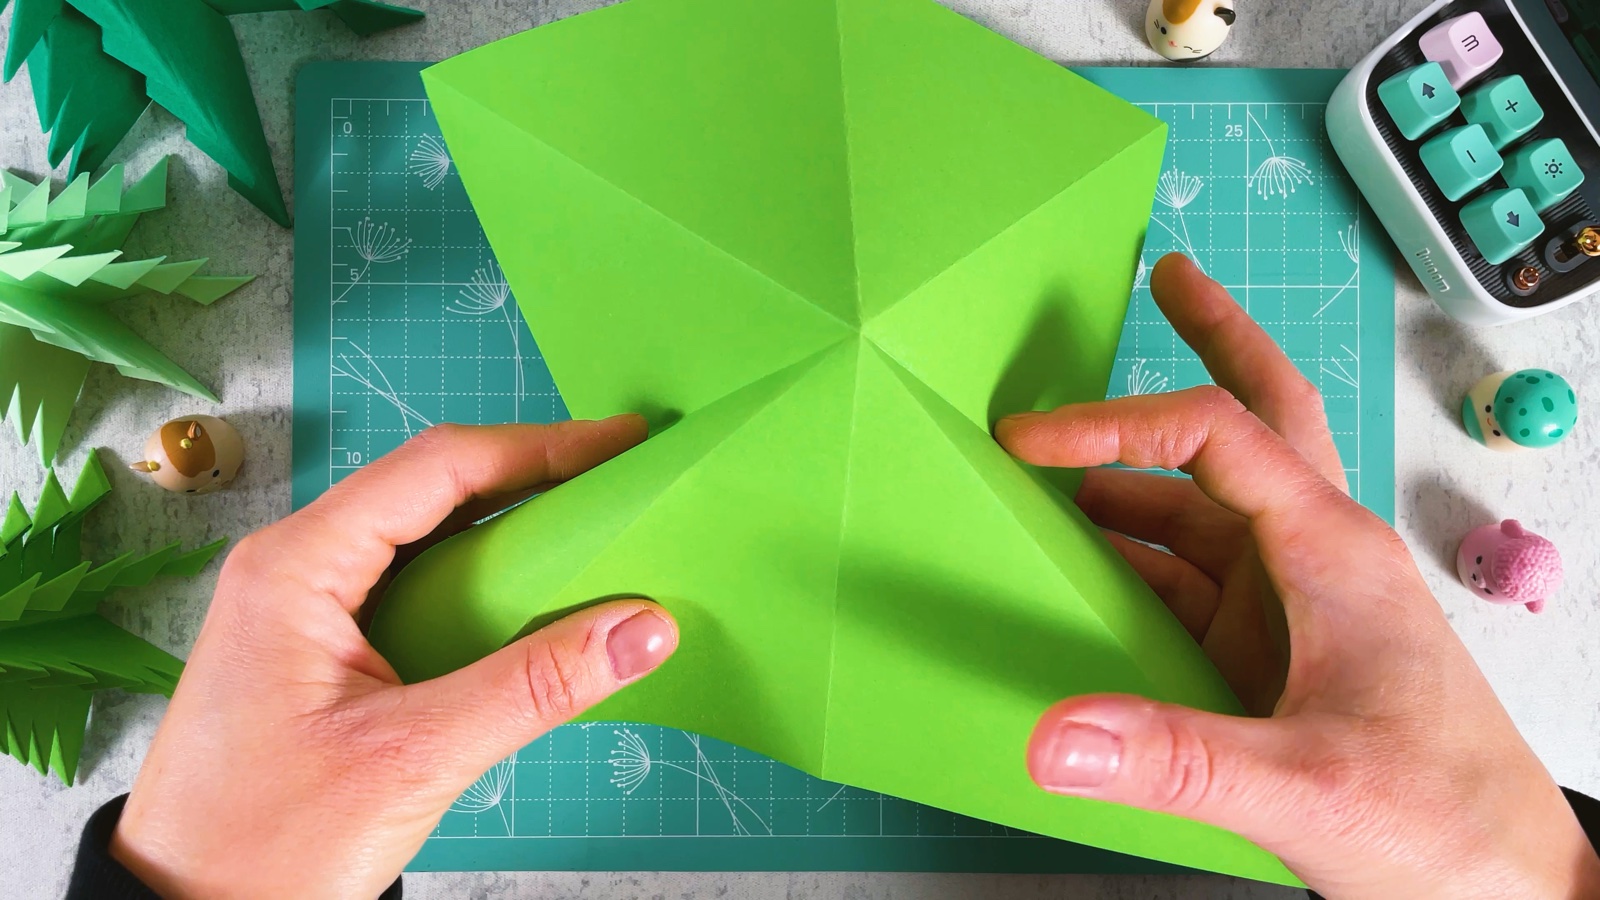
Keep pushing until the paper folds flat into a triangle with layers on each side.

- 5
Fold the sides to the middle
Take the top layer. Fold the right corner up so its edge lies on the middle line.

Do the same with the left corner.

- 6
Repeat on the other side
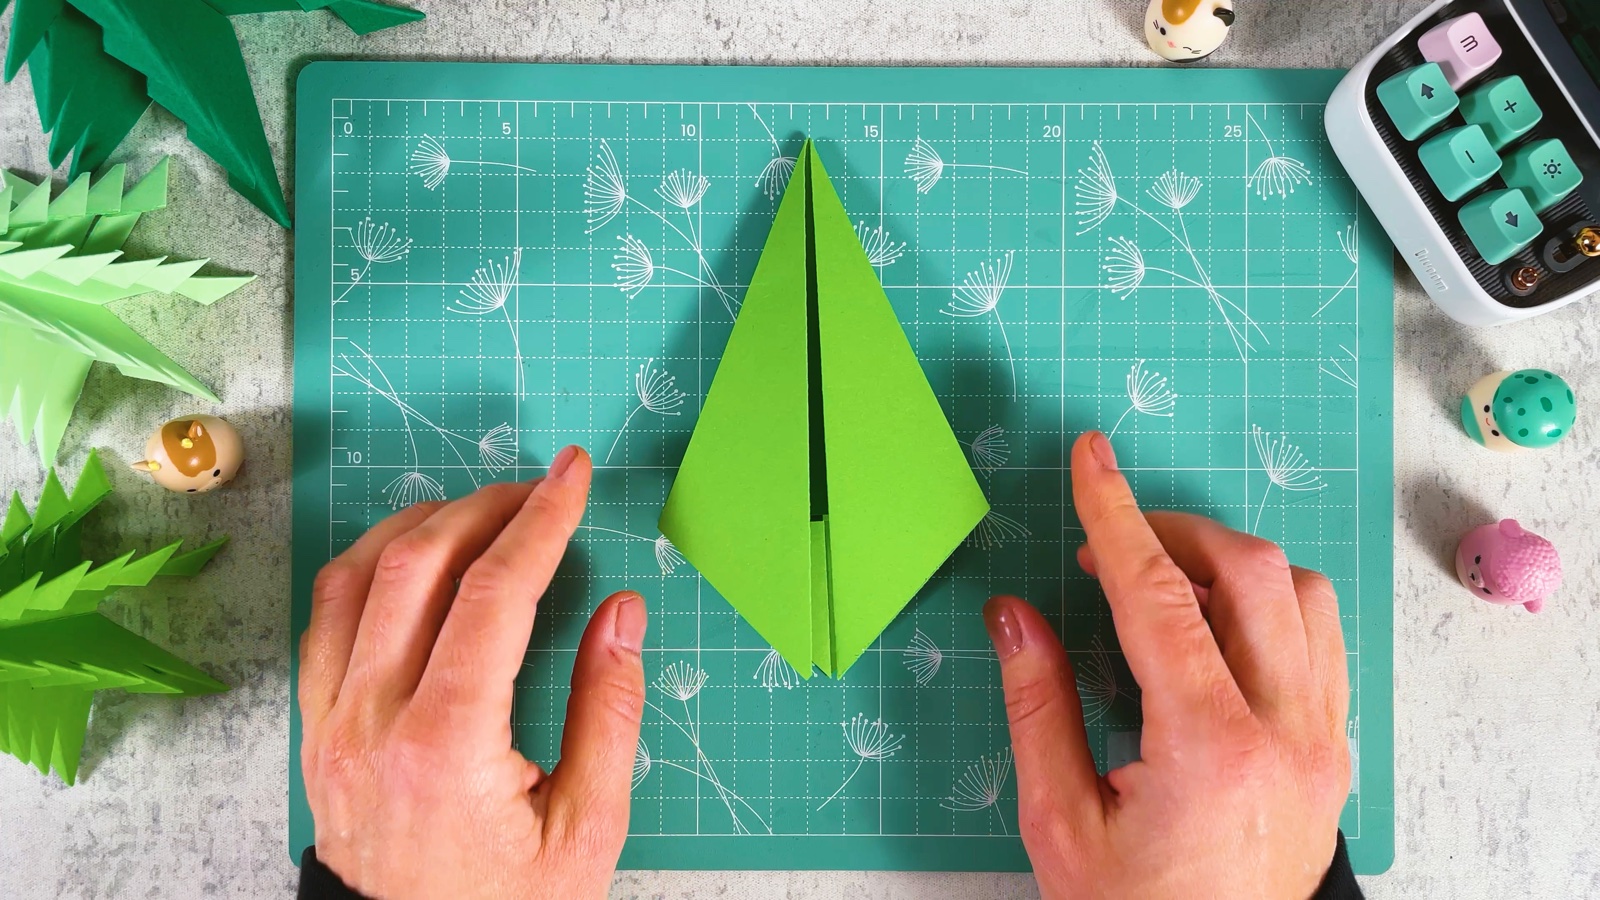
Turn the paper over and fold the two corners to the middle in the same way. Now the shape is a long, narrow diamond.
- 7
Fold the inside layers
Now we fold the inside layers. Lay the narrow diamond flat in front of you.
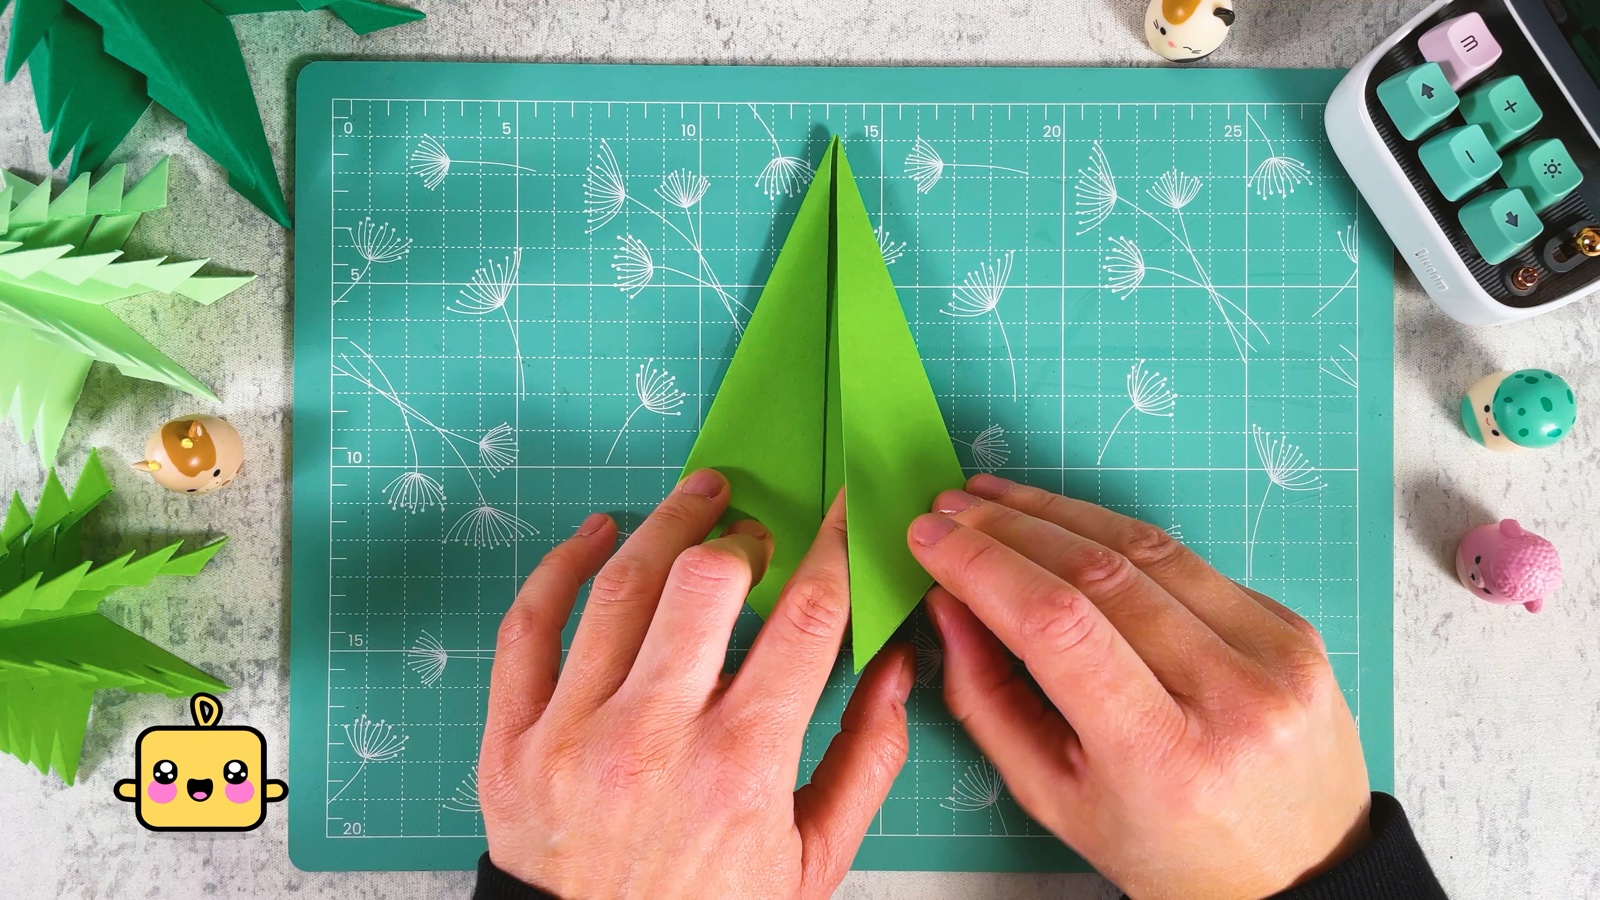
Lift one flap and turn it over to the other side, like a page in a book. A fresh flat side faces you.
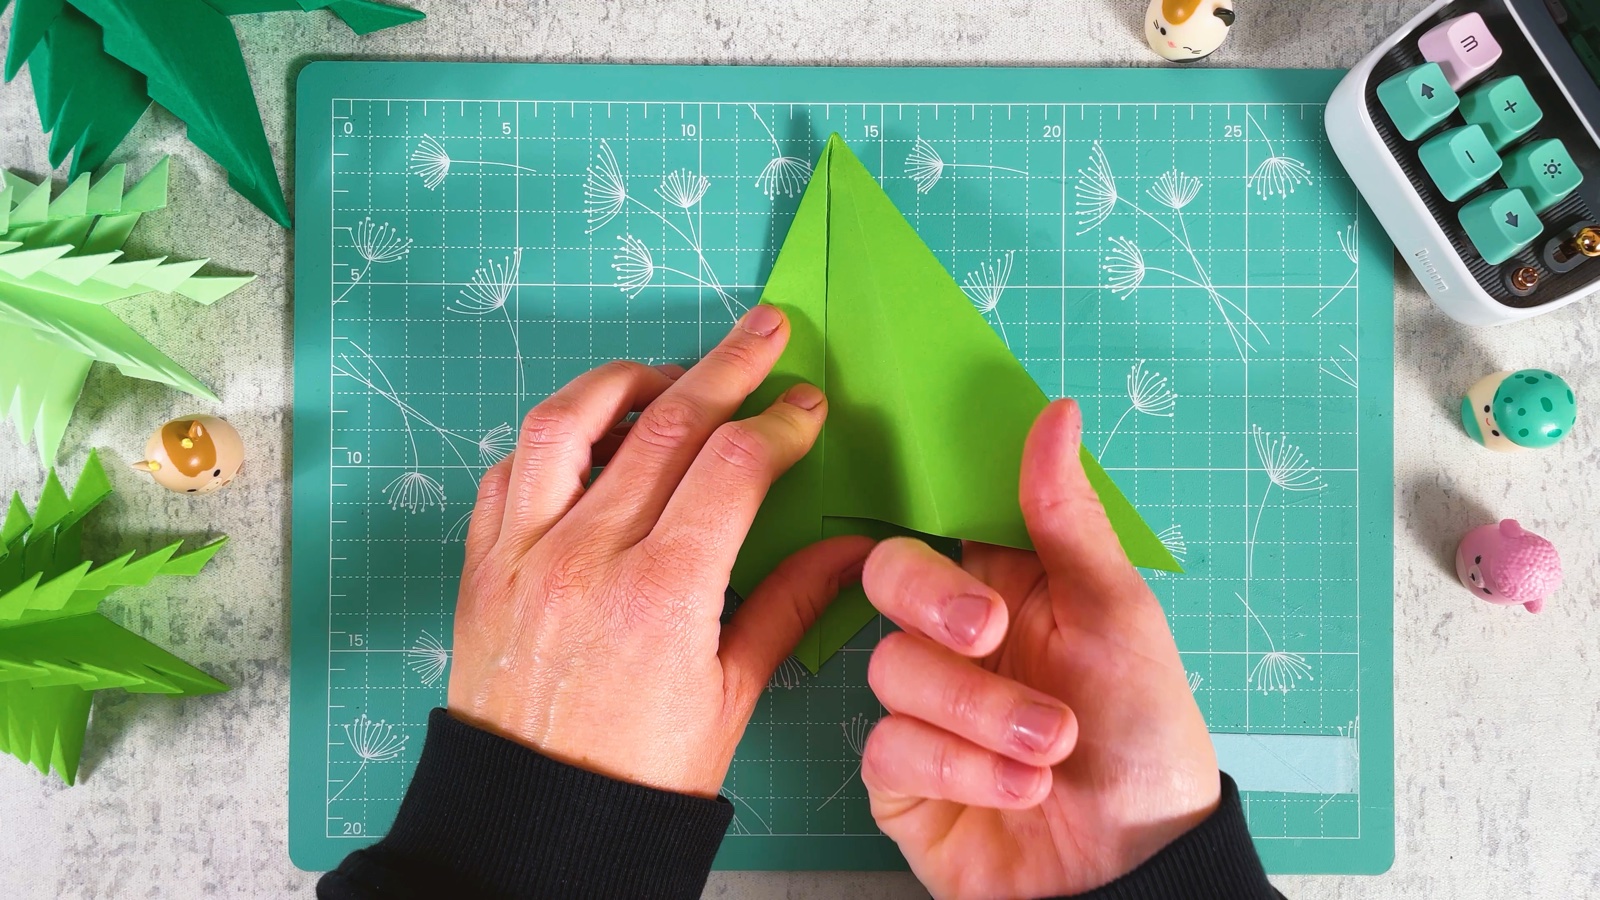
Press the new side flat with both hands.

Fold its edges to the middle line, the same way as before.
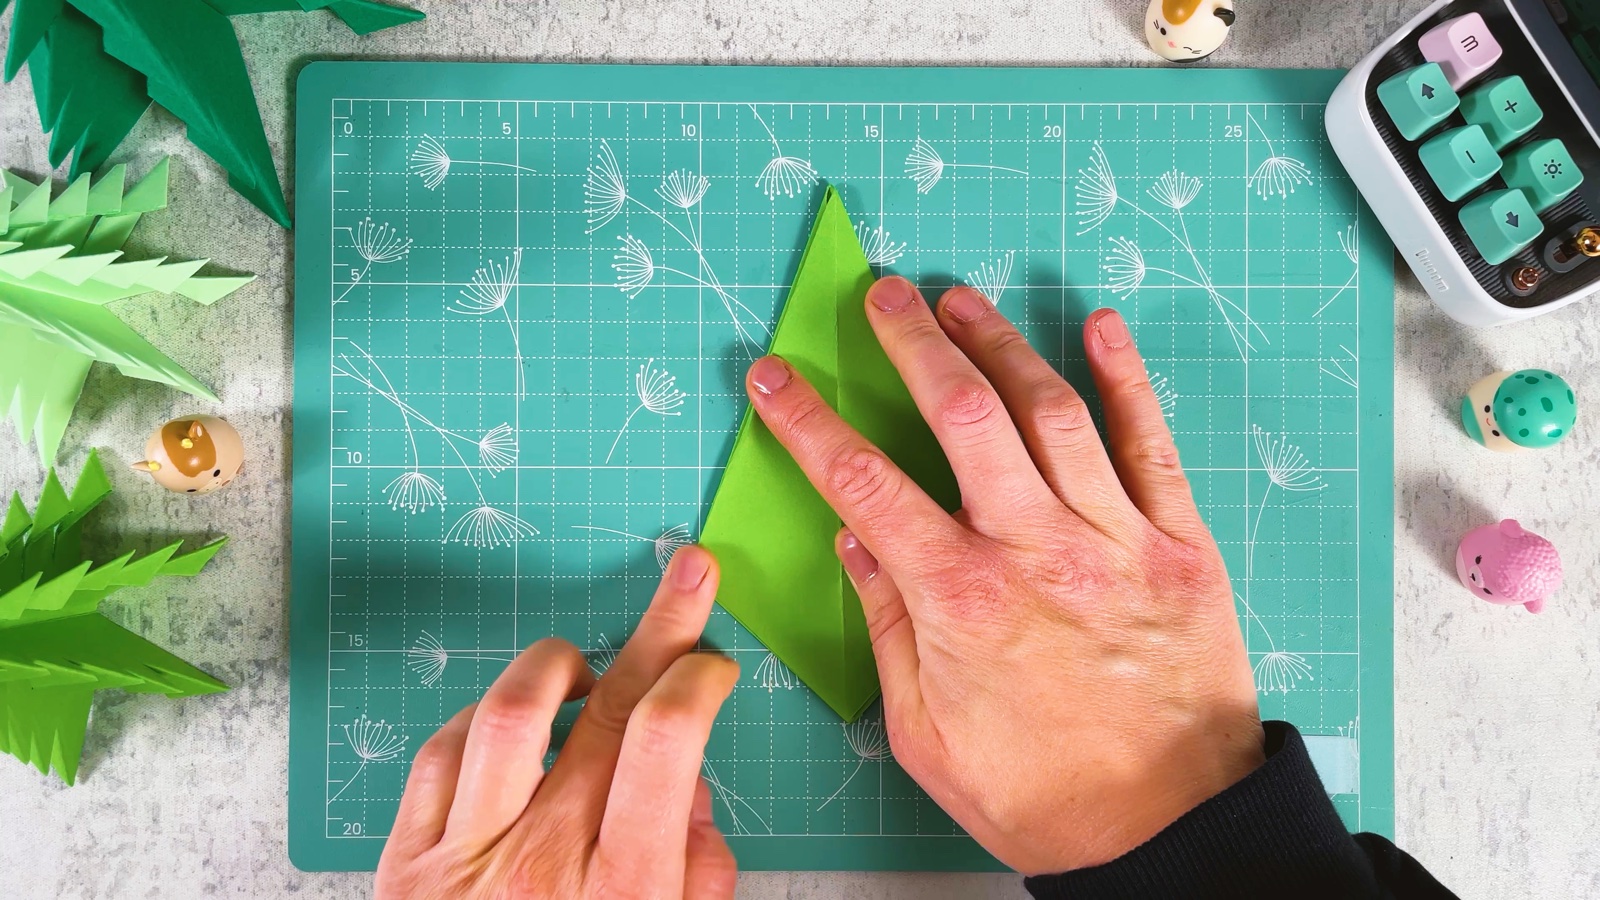
Turn the next page and do the same on every side, until the whole shape is narrow and pointed.

- 8
Trim the bottom
Cut straight across the wide end to trim off the extra paper. Cut through all the layers at once.
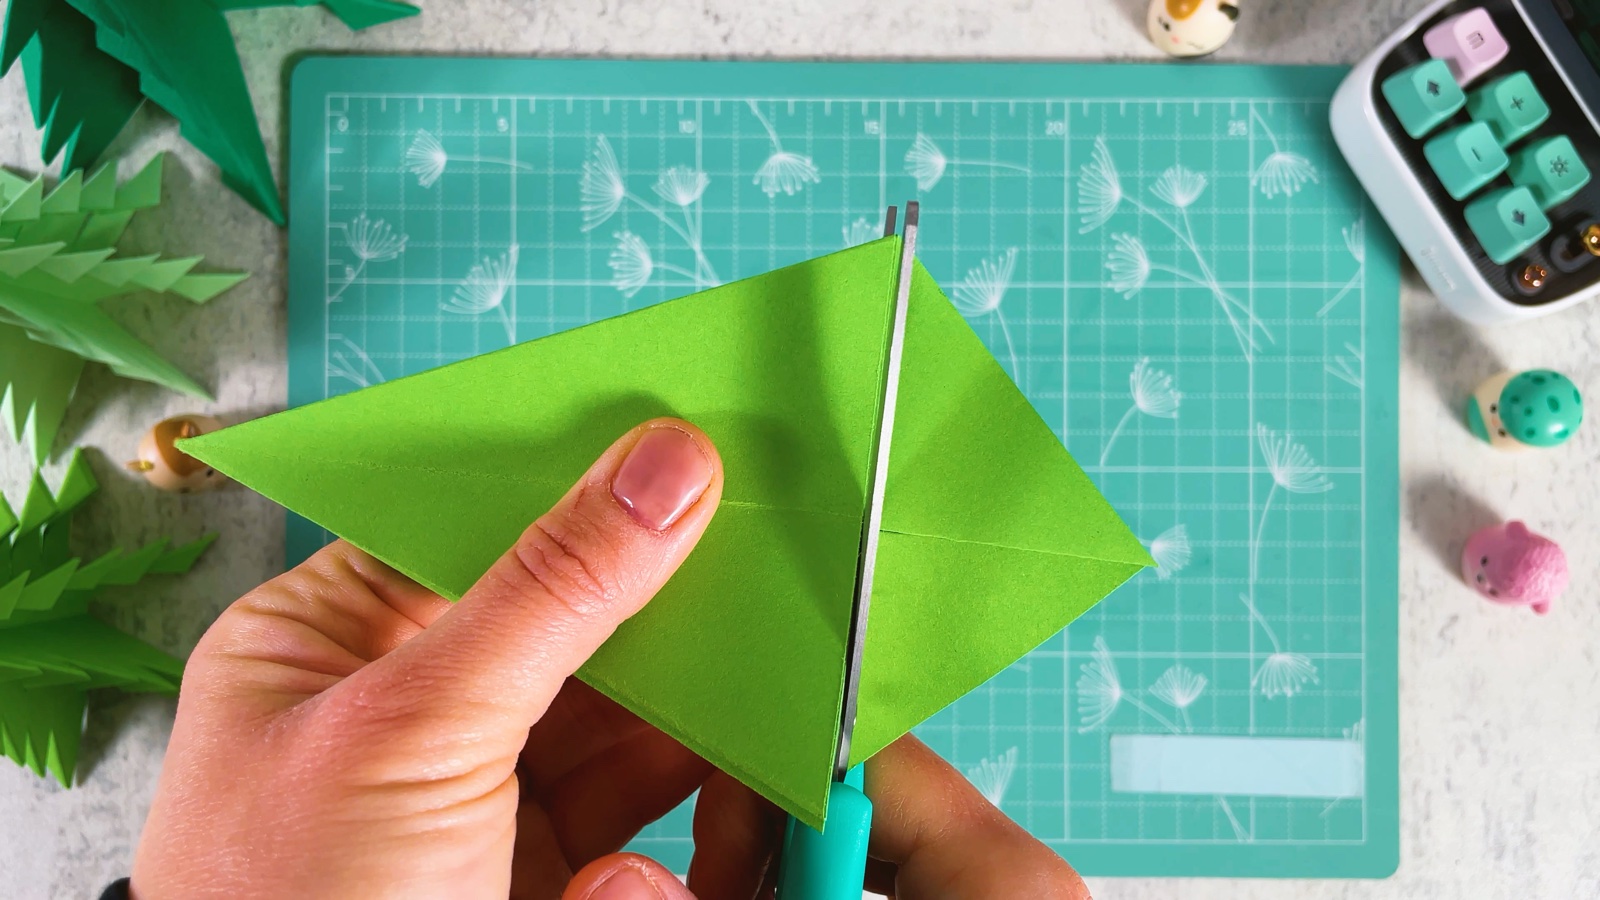
Now the shape is a tall triangle with a flat bottom edge.

- 9
Cut the branches
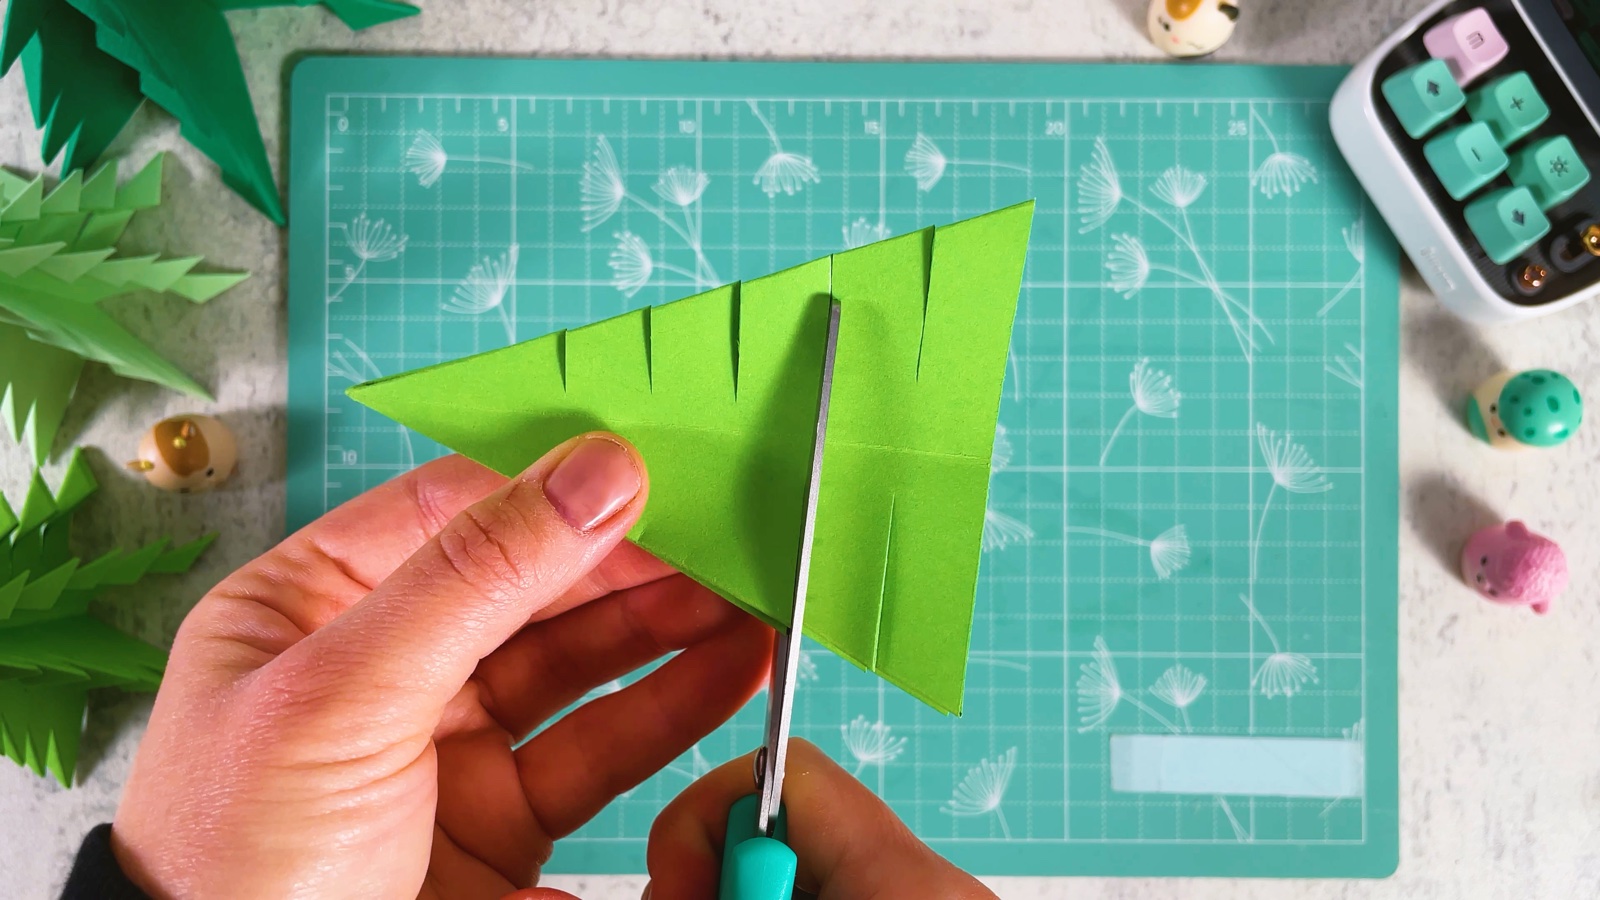
Hold the folded shape with the point away from you. Make short slanted cuts along one long edge, from the bottom up to the top. Don’t cut all the way to the middle line.
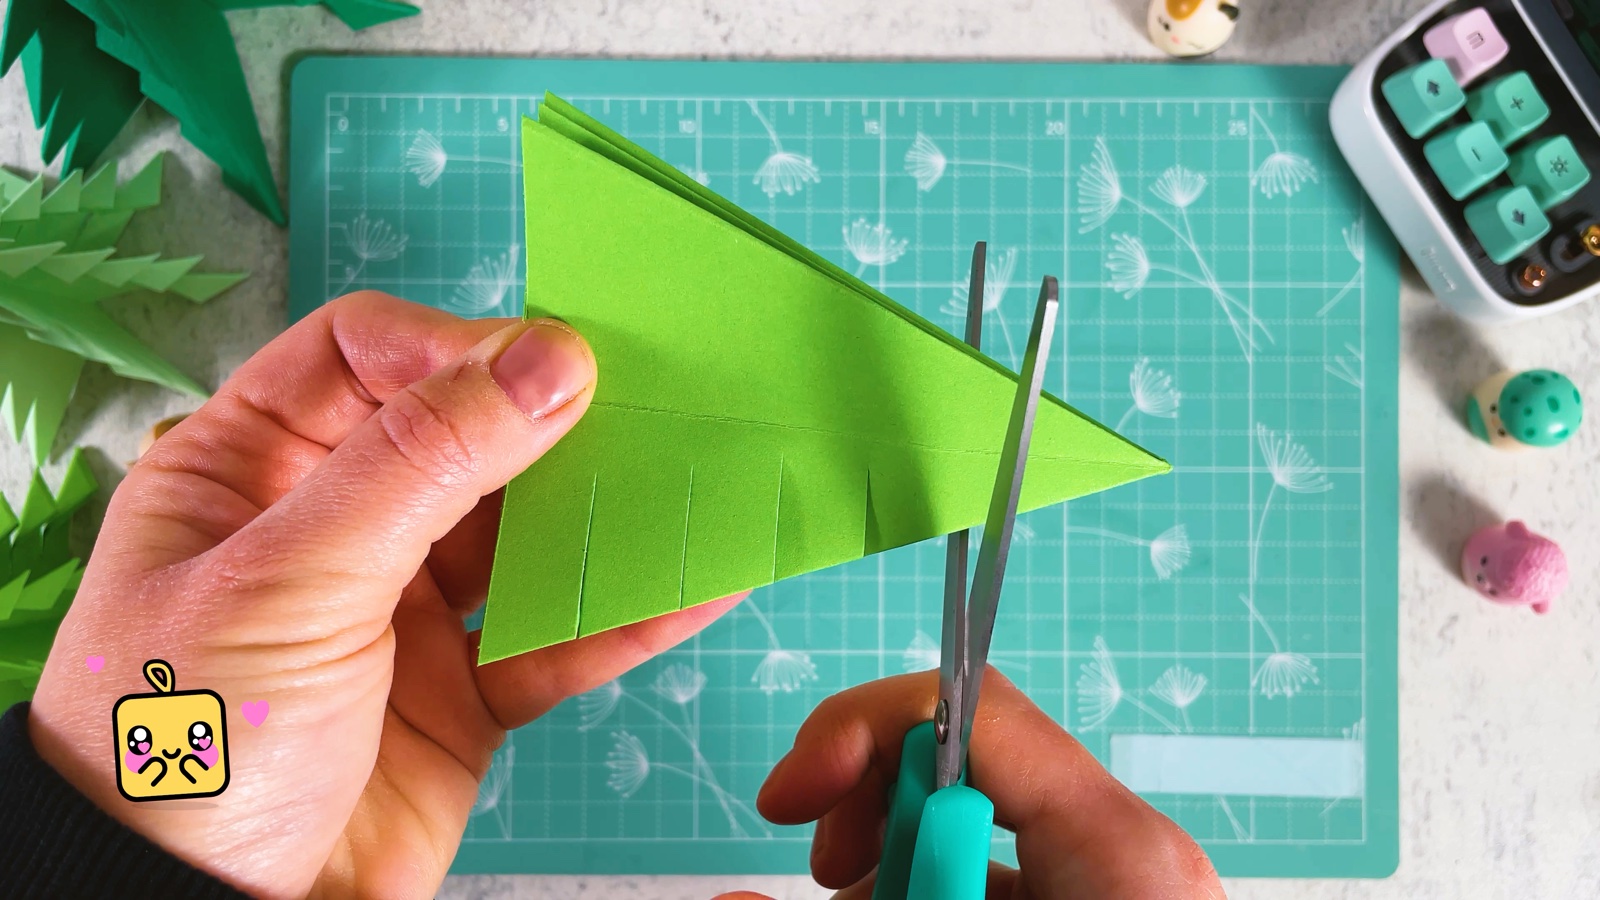
- 10
Cut the other edge
Turn the shape over and cut the other long edge in the same way. The cuts go through all the layers at once.
- 11
Fold the branches down
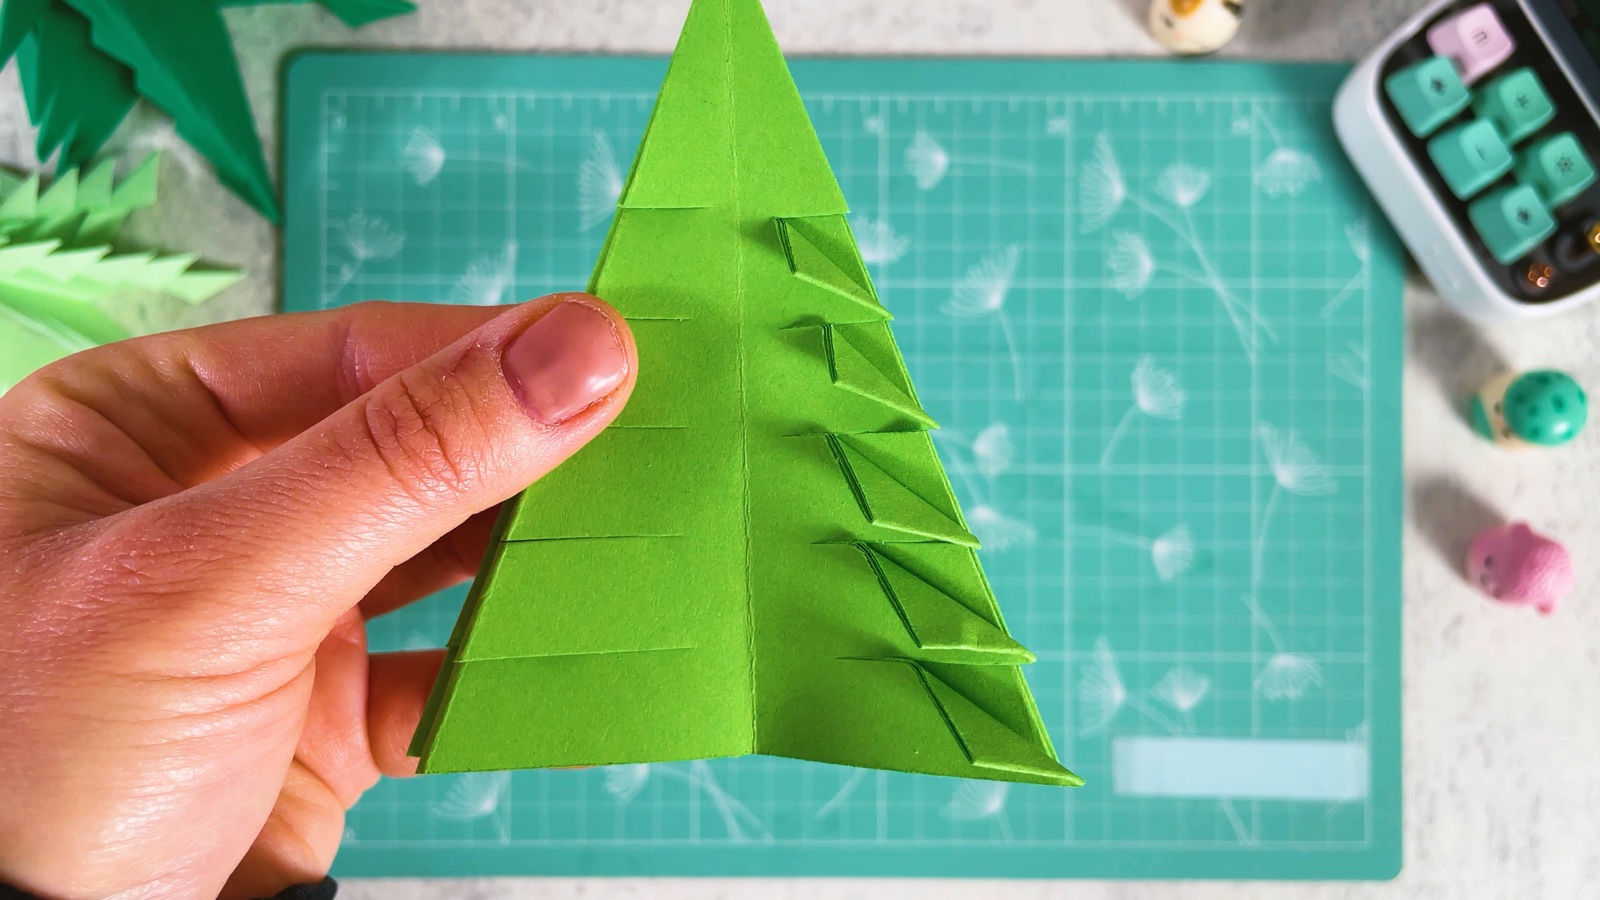
Between every two cuts there is a small flap. Fold each flap down and in, so it points to the bottom. Do it on every side, one layer at a time.
- 12
Open the tree
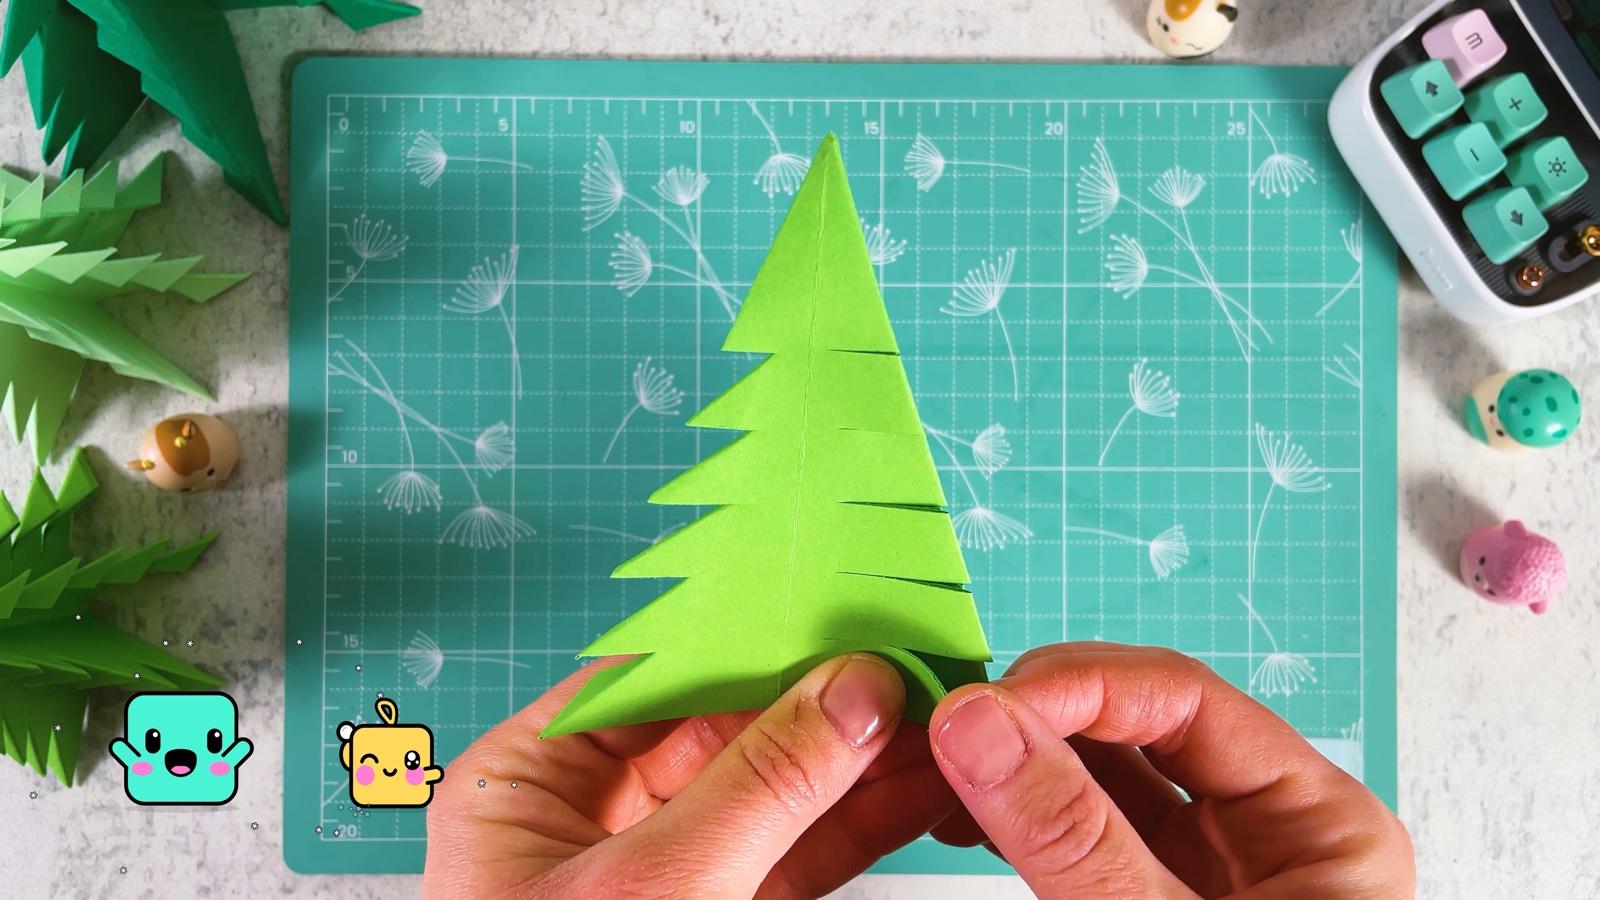
Gently pull the layers apart at the bottom, so the tree opens up into a star shape and stands on its own. Fluff the branches a little with your fingers.
- 13
Make a little forest
Your first tree is done. Fold a few more in different greens, big and small, and one in white for snow.
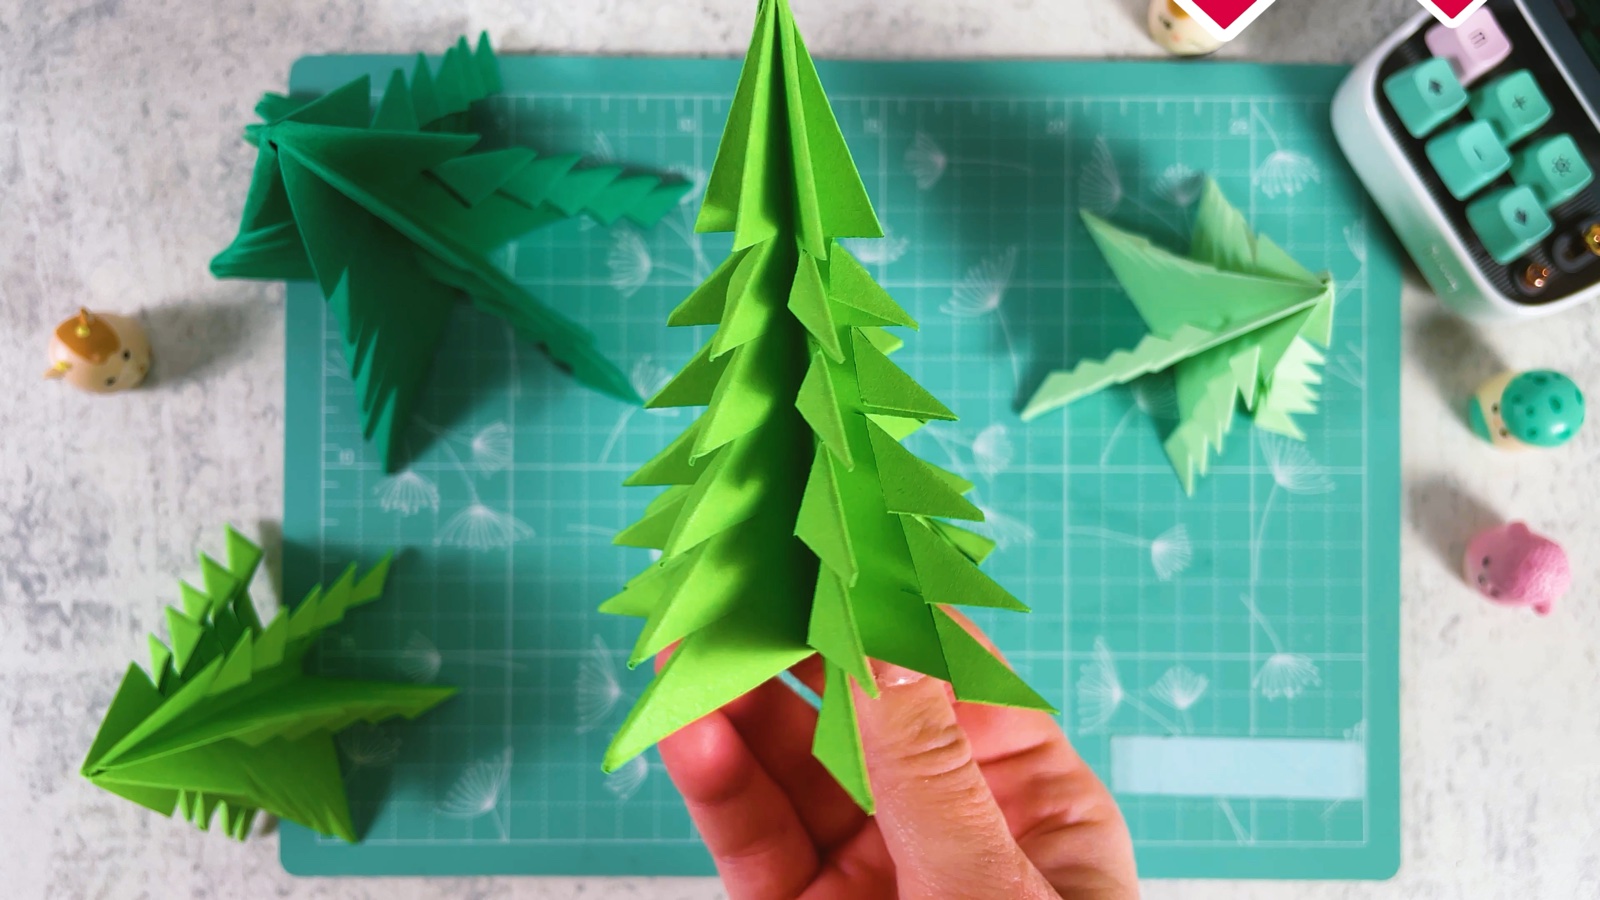
The paper Christmas tree is ready.
THREE LITTLE TIPS
Make it easier.
- Sharp folds, neat tree. Run your fingernail along every fold. The layers lie flatter and the cuts come out cleaner.
- Thin paper works best. Printer paper or origami paper folds well. Thick card is hard to cut through all the layers.
- Different sizes, a real forest. A bigger square makes a taller tree. Mix sizes and greens for a forest that looks alive.

A CUBI MINI MOMENT
Who lives in your paper forest?
Cubi made a whole forest and left a little clearing in the middle for Mini. Who will live in yours?
A tiny white tree for Mini, so it looks like snow fell just on that one.
Loved making it?
Catch the next make first, or save this one for a rainy day.